
Step by step instructions for installing the snippet of code that enables Advocado to track web visitor and calls.
1. Log into your Google Tag Manager account.
2. Click Add A New Tag.
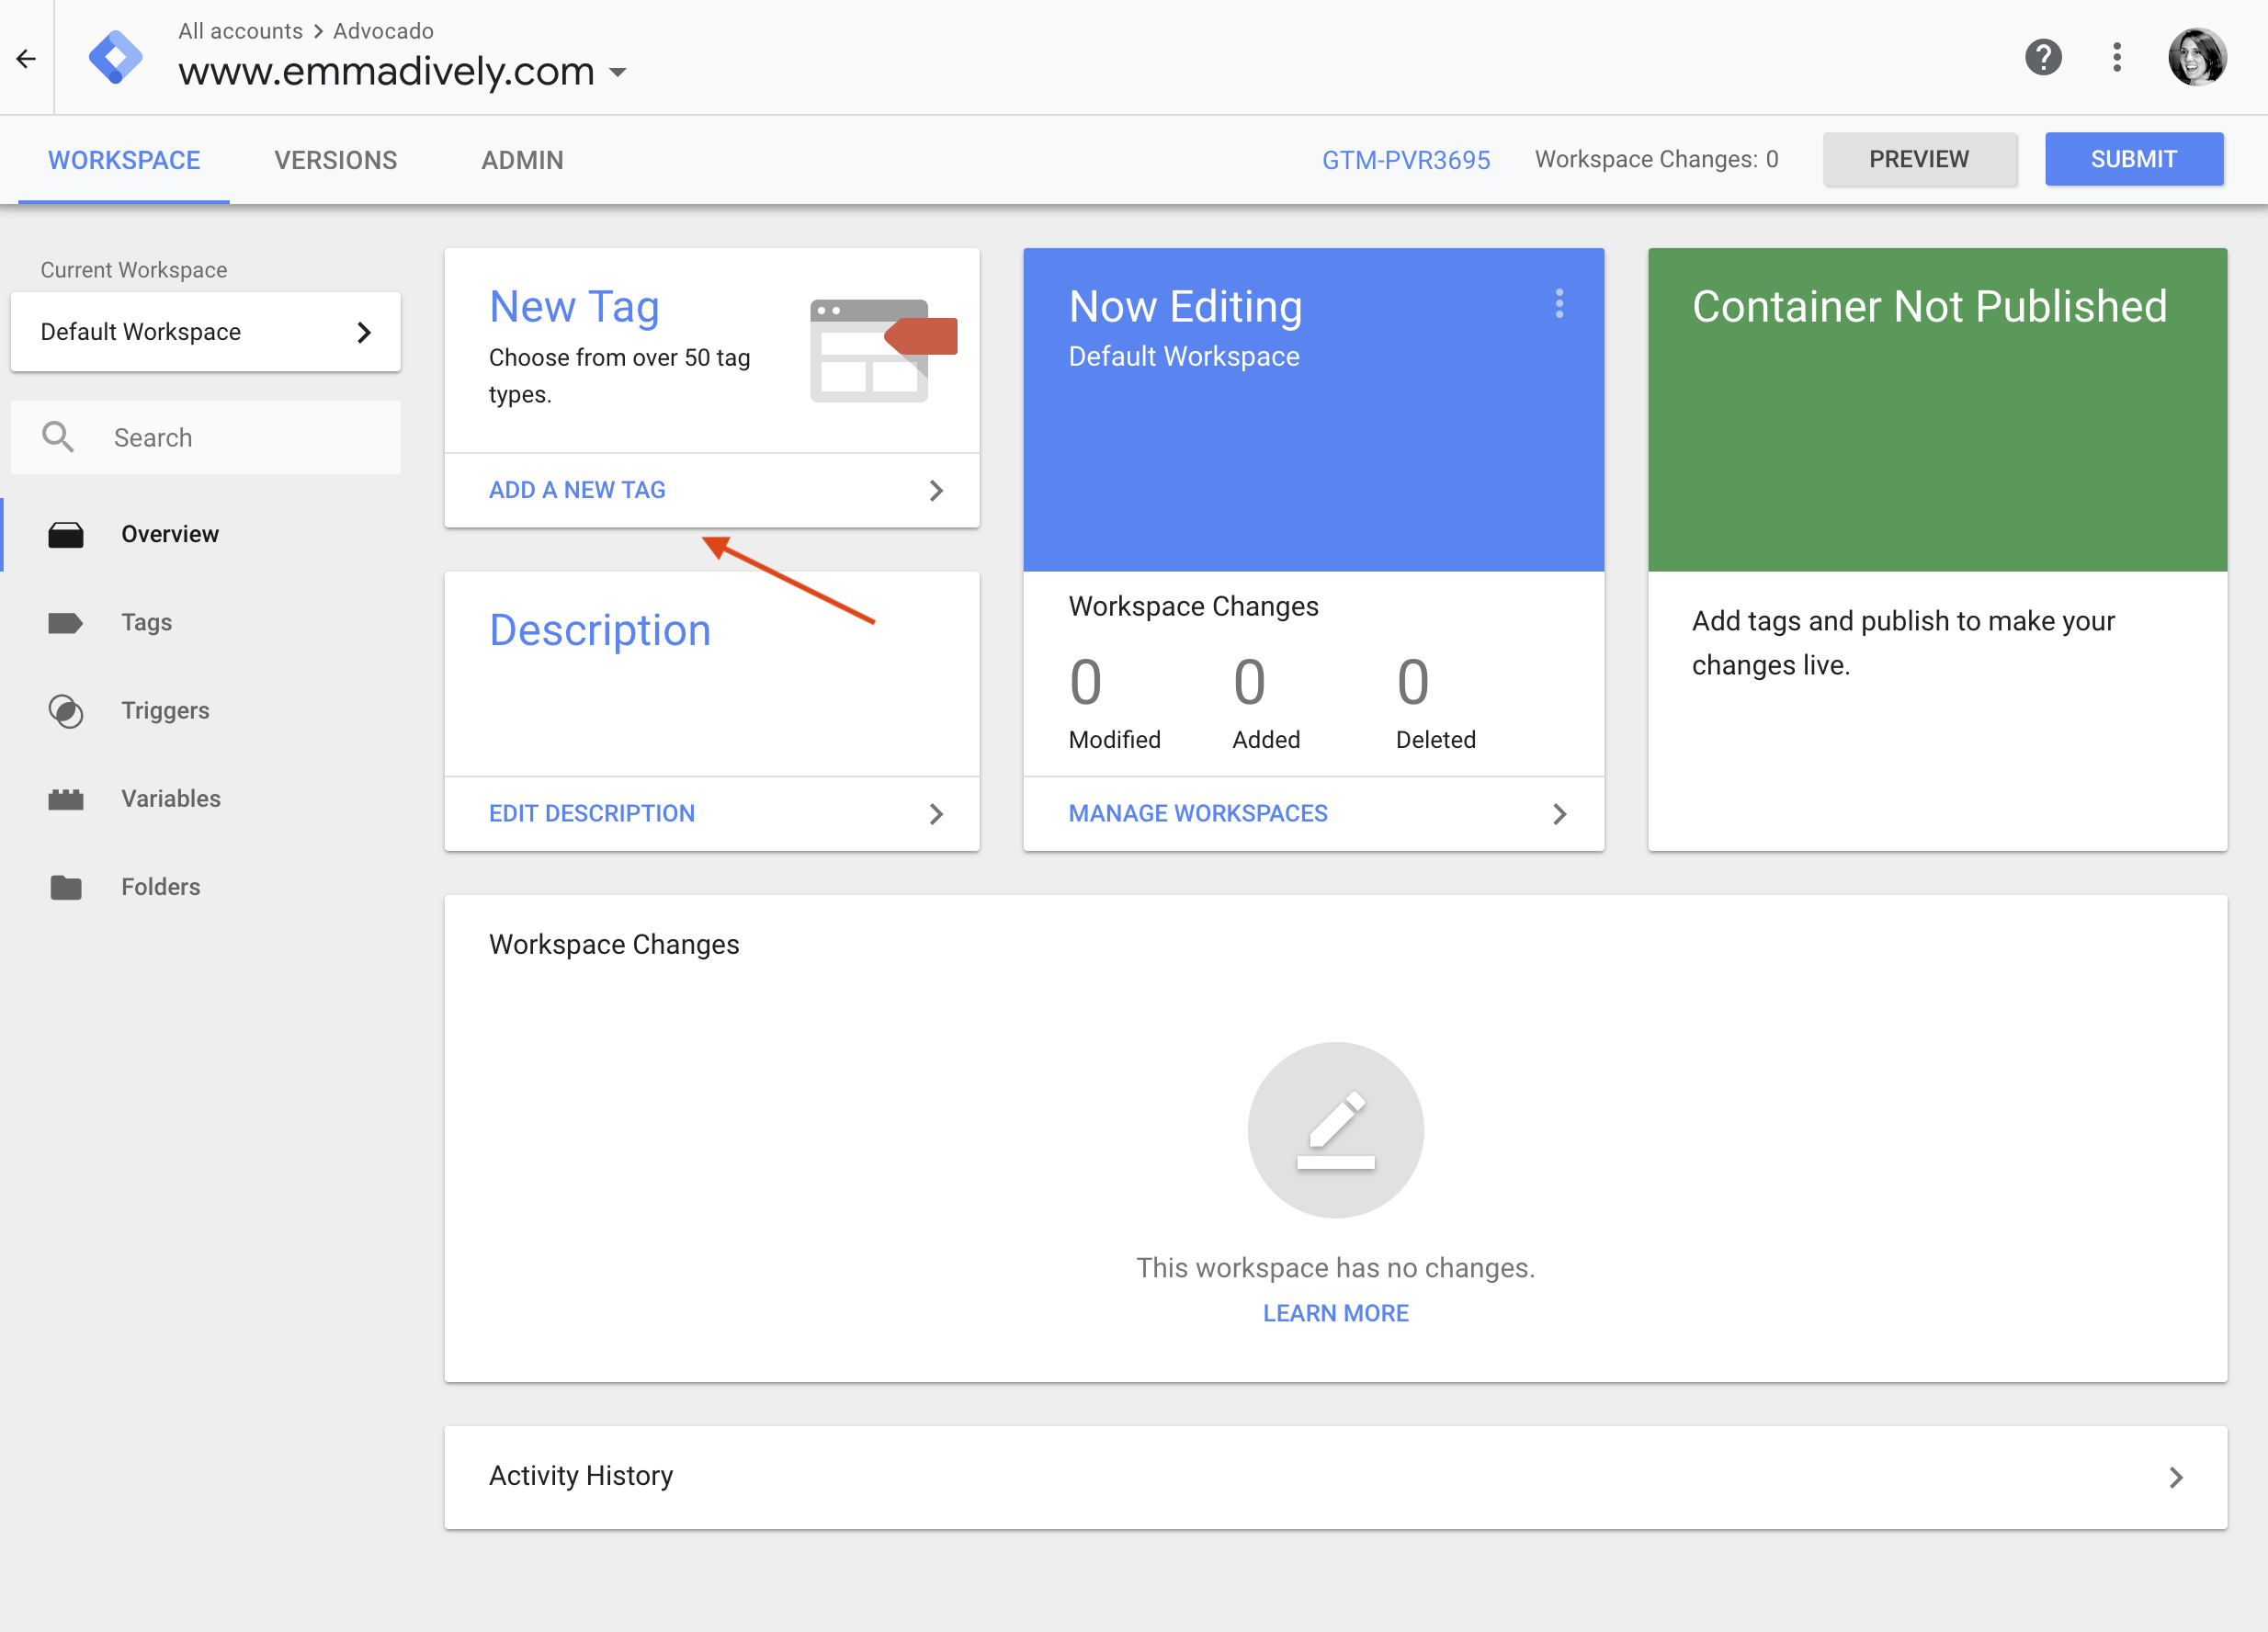
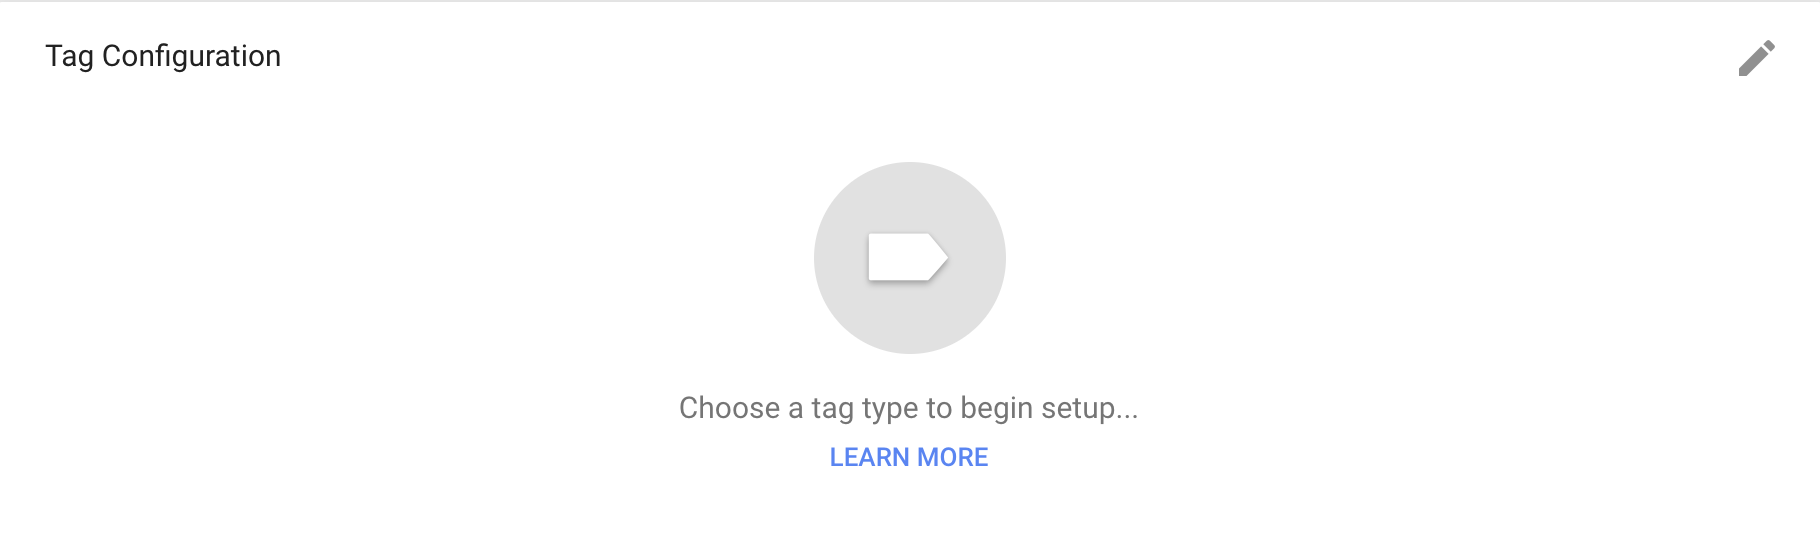
3. Click Choose a tag type to begin setup...
4. Name the trigger something like Advocado.
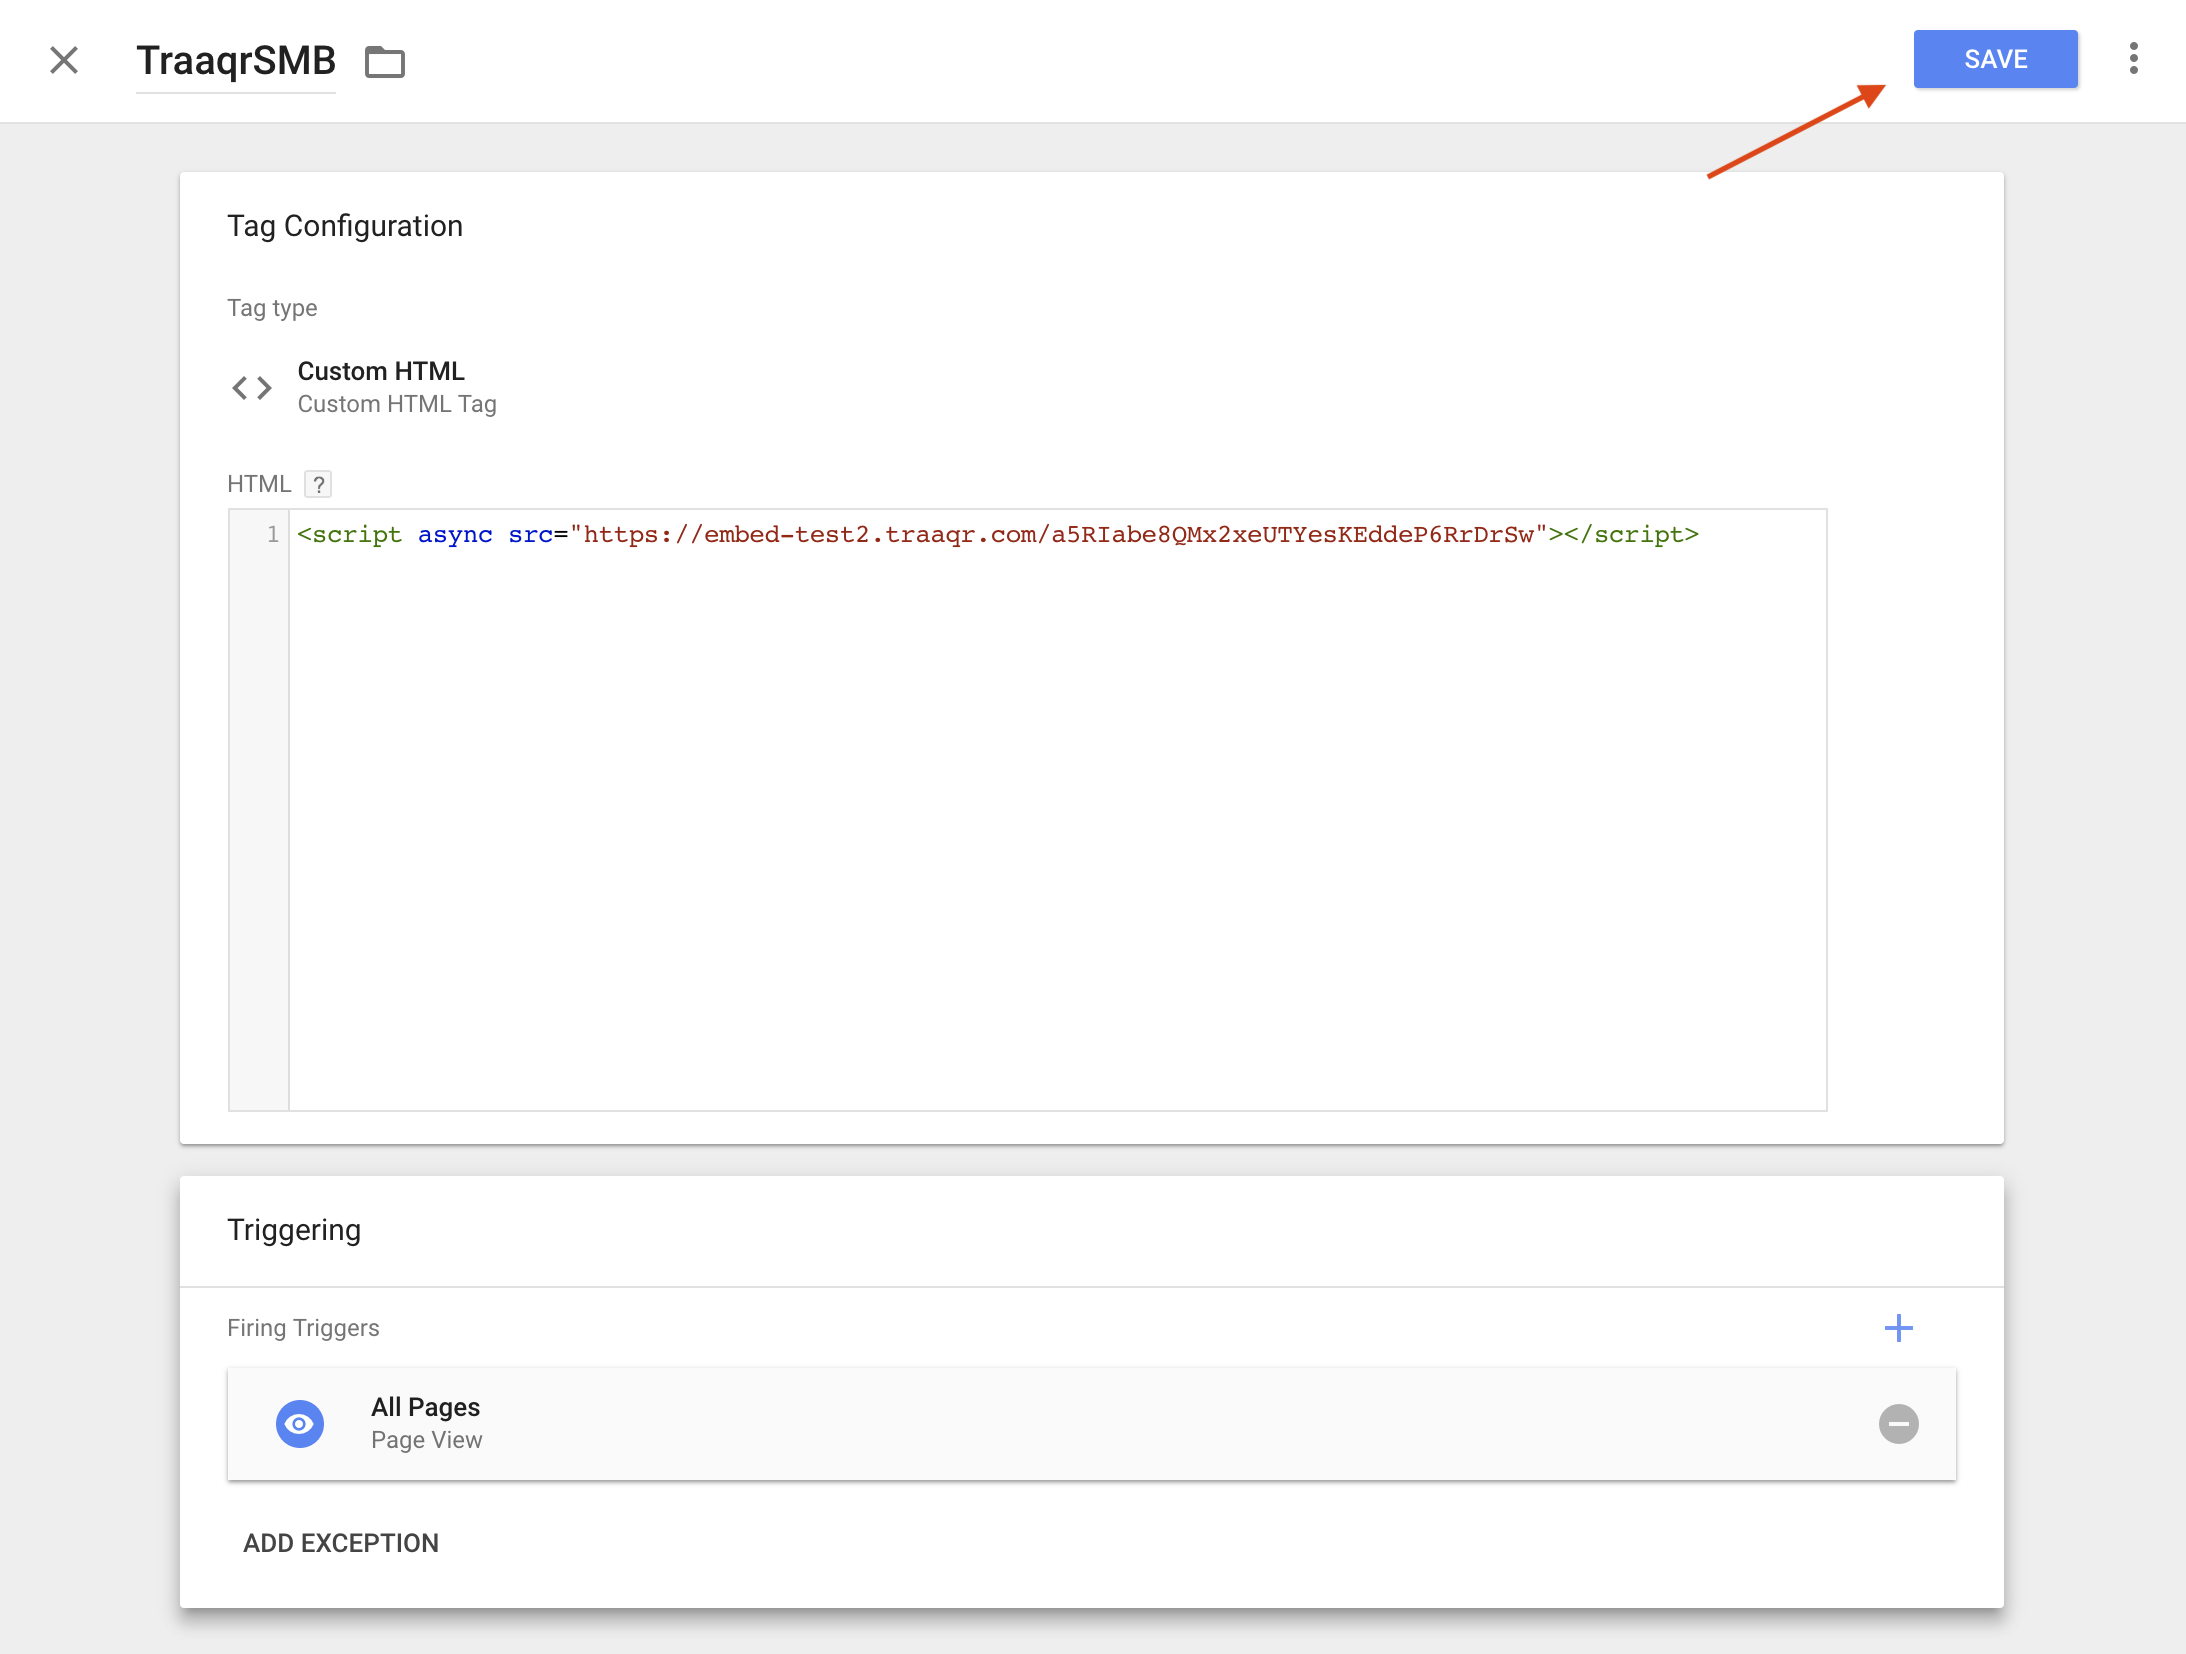
5. Select Custom HTML.
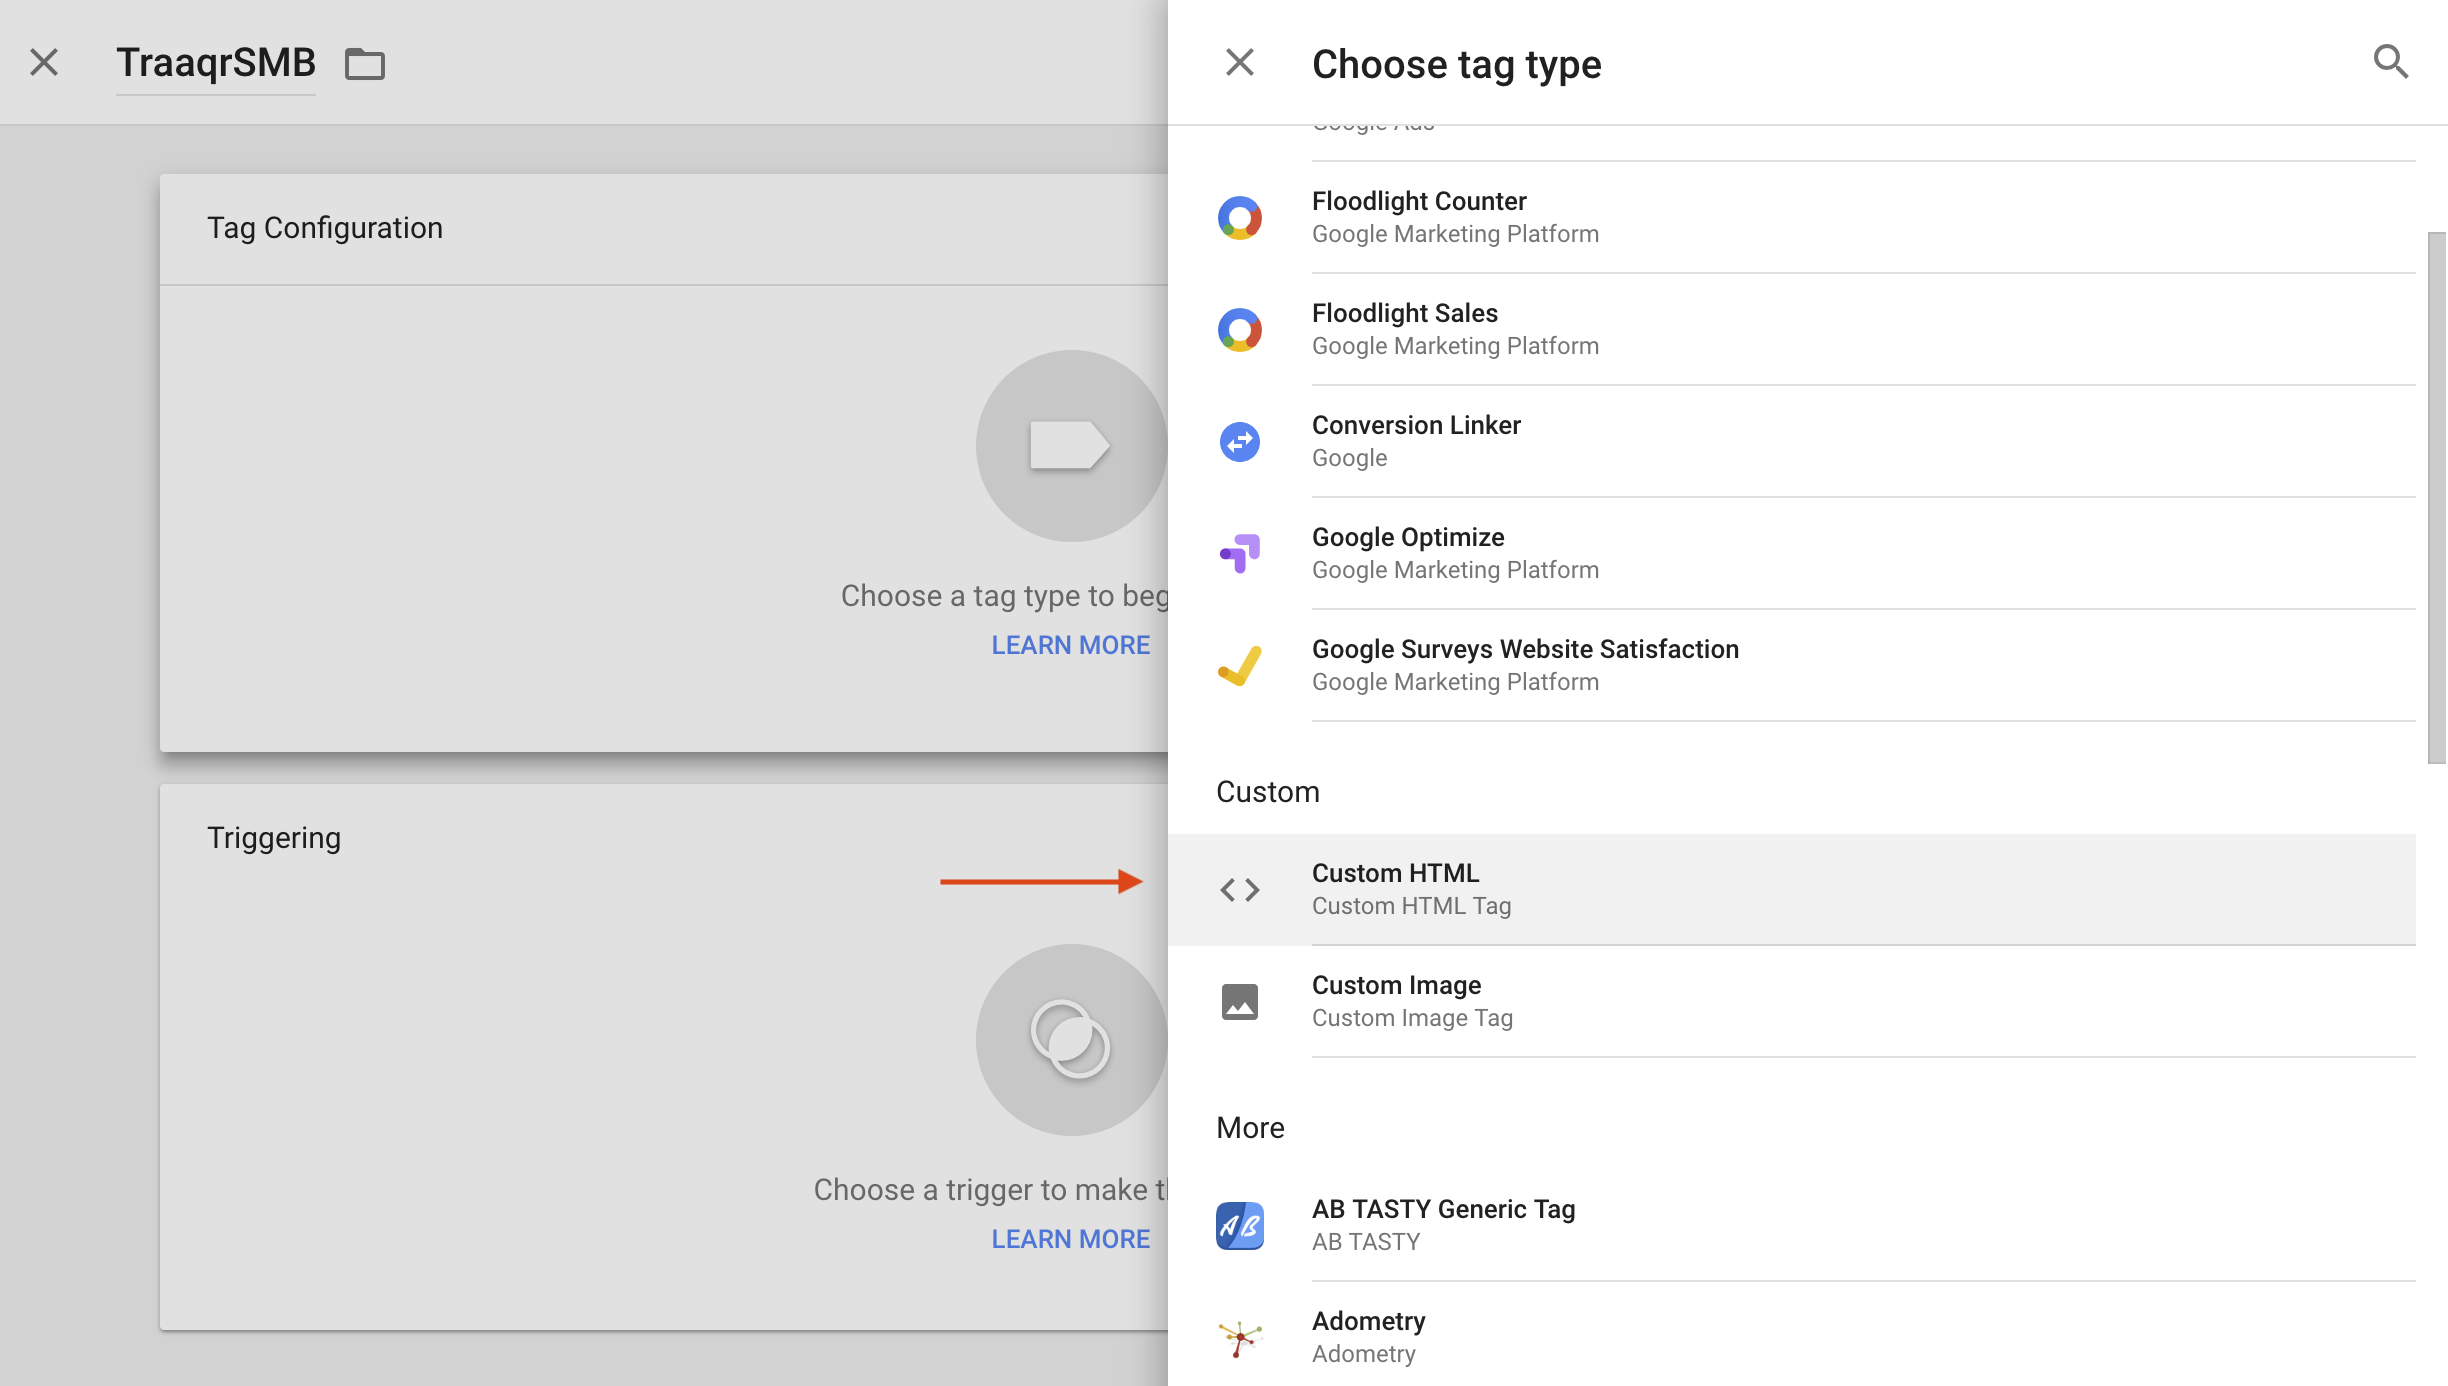
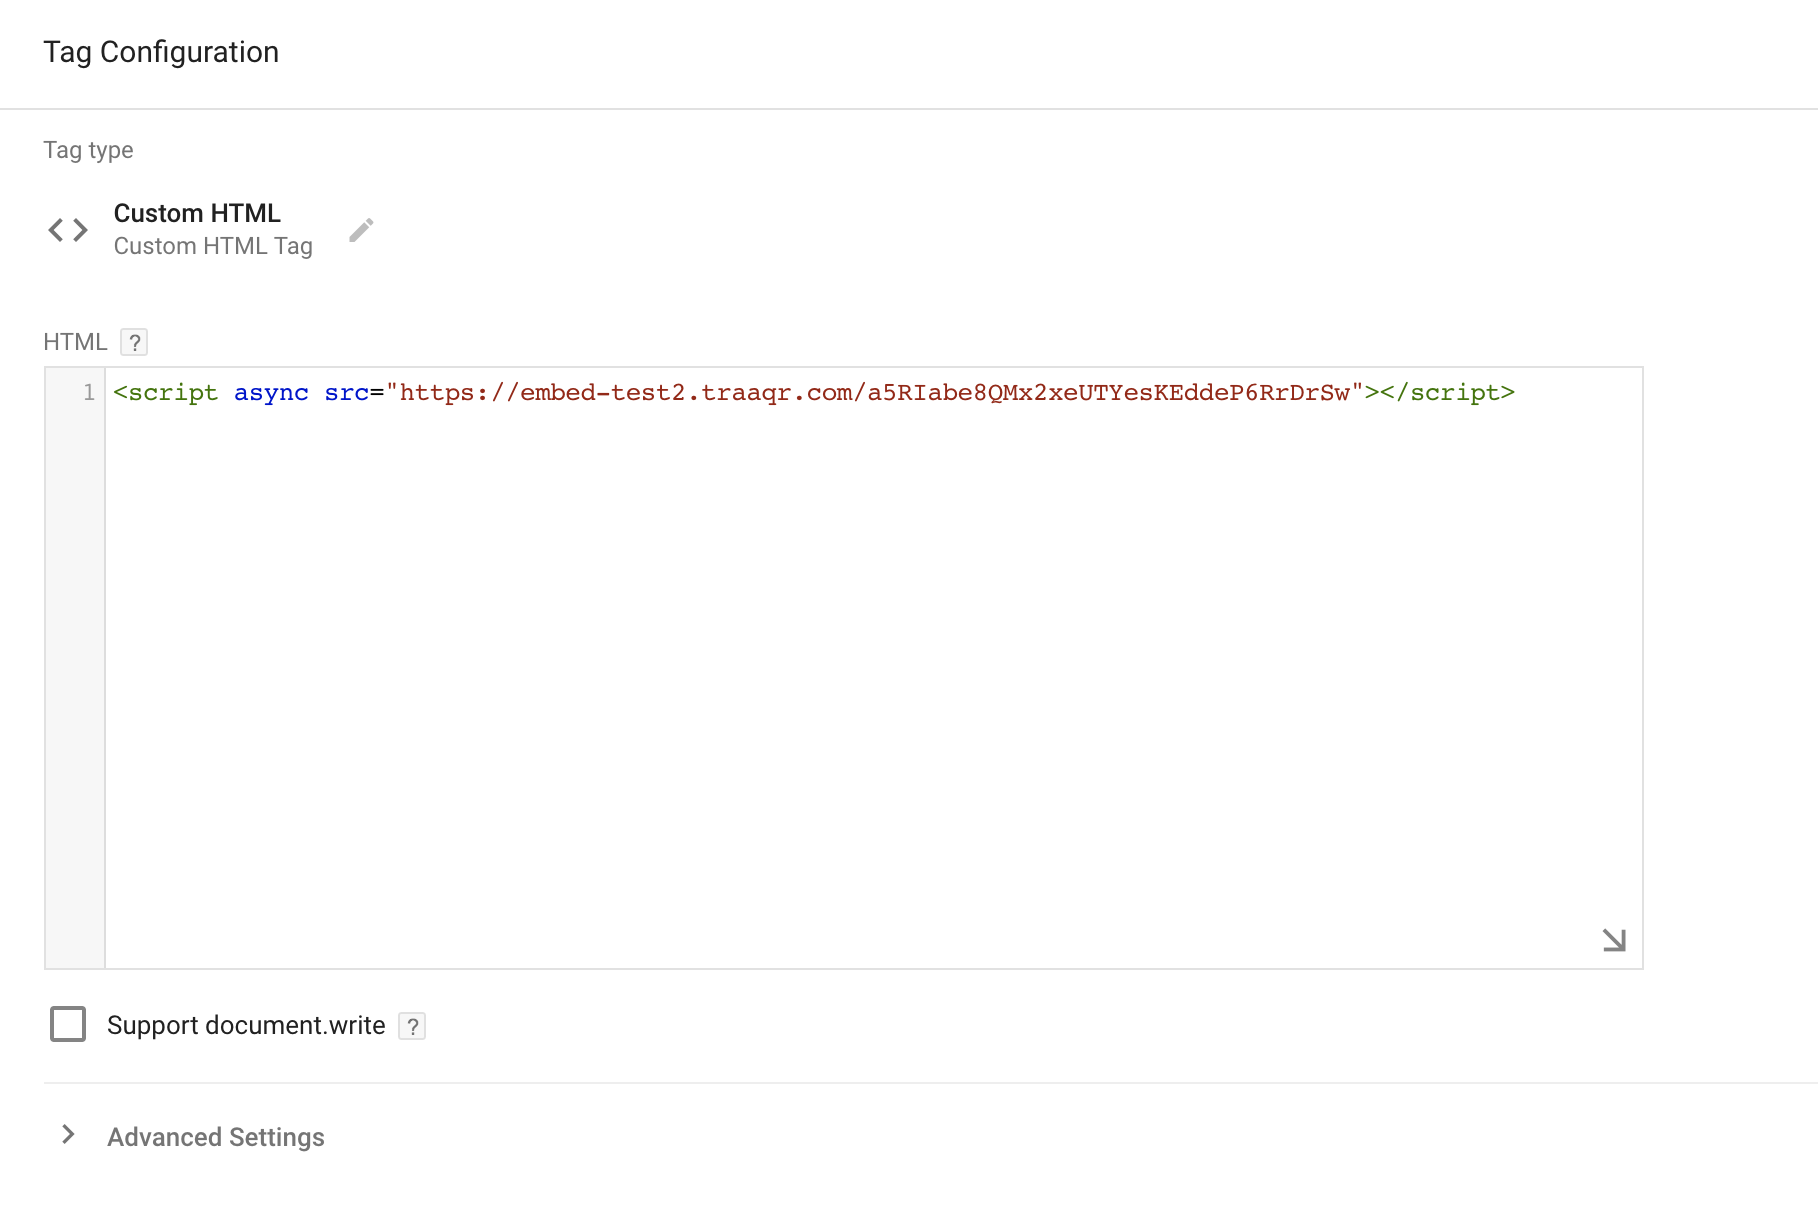
6. Enter the Advocado snippet of code in the HTML field.
7. Click Choose a trigger to make this tag fire...

(Note: if you'd like to track traffic on only one path and not the entire website, skip to step 10.)
8. If you would like to track traffic on the entire website, select All Pages.

9. Hit Save.
10. When your new tag is added, you see a message at the top right of your screen notifying you that you've made a workspace change. Click Submit and then Publish.
OPTIONAL: If you to track only one path instead of the entire website, follow these steps:
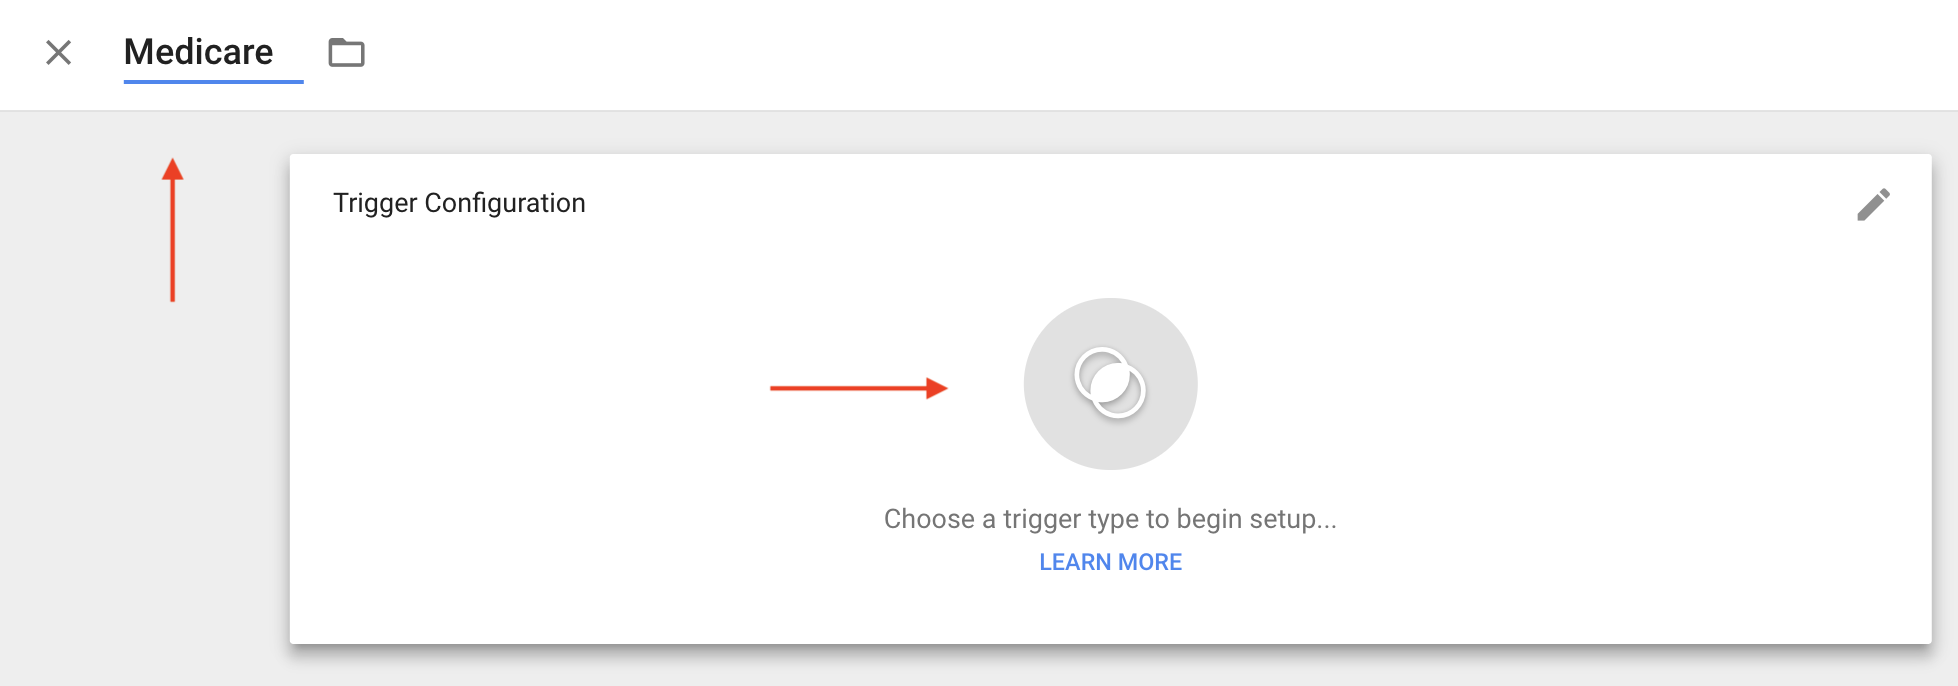
11. Click the plus sign (+) to add a new type of trigger.

12. Name your trigger and click the circle to add a new trigger.
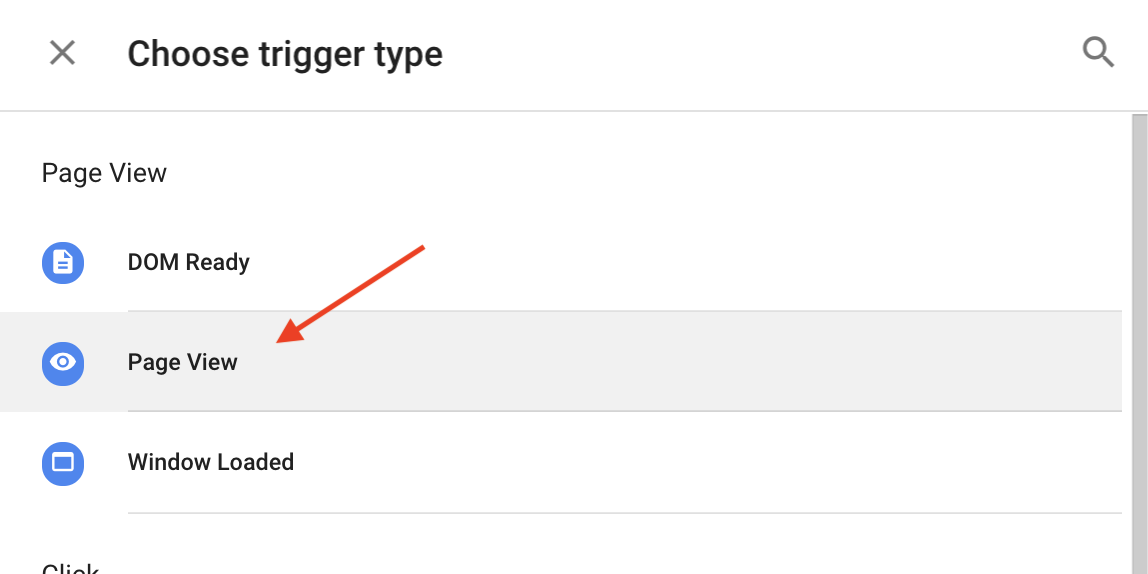
13. Choose the Page View trigger type.
14. Under "This trigger fires on," select Some Page Views.
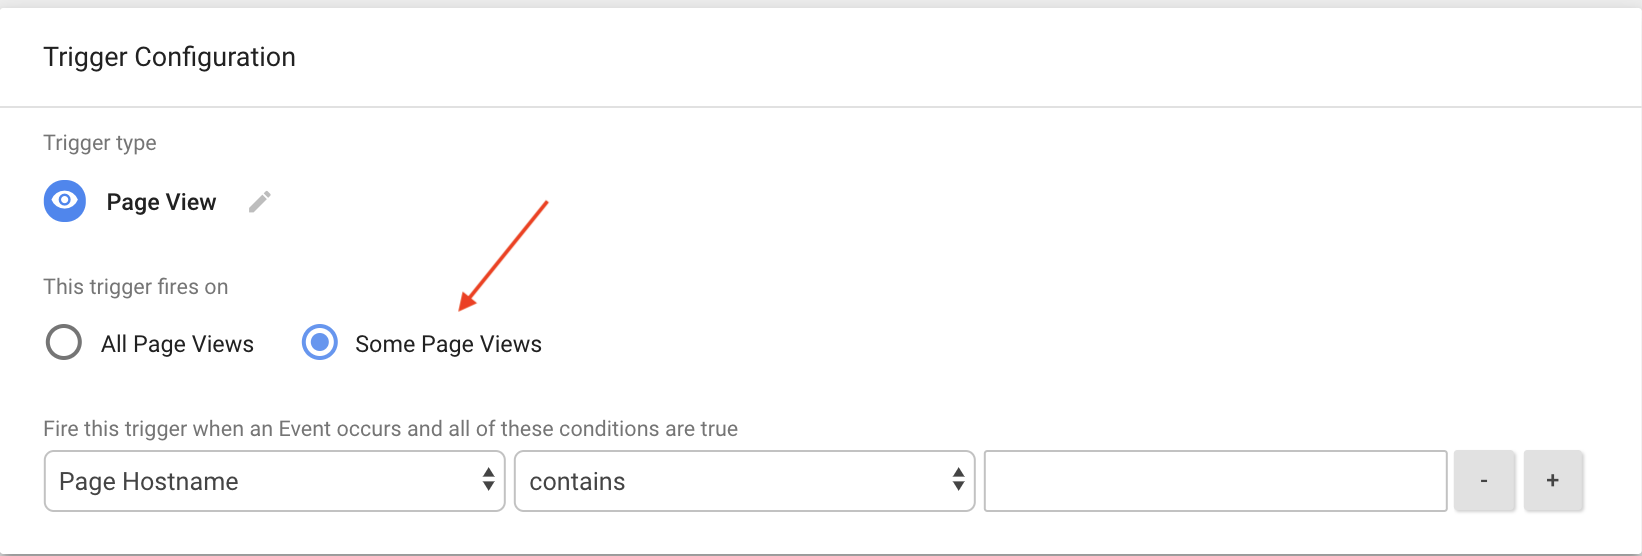
15. In the drop down menu on the left, select Page Path. In the middle, select contains. And in the menu on the right, type the Page Path that you'd like to track.
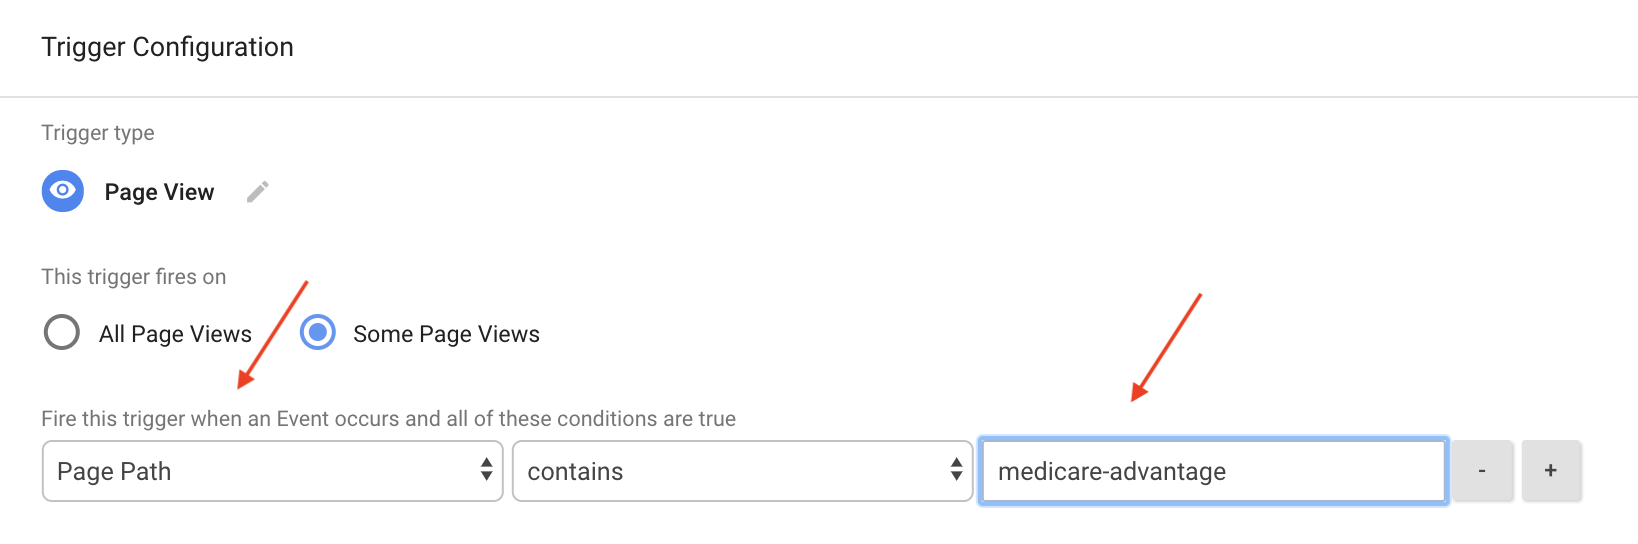
16. Click Save.
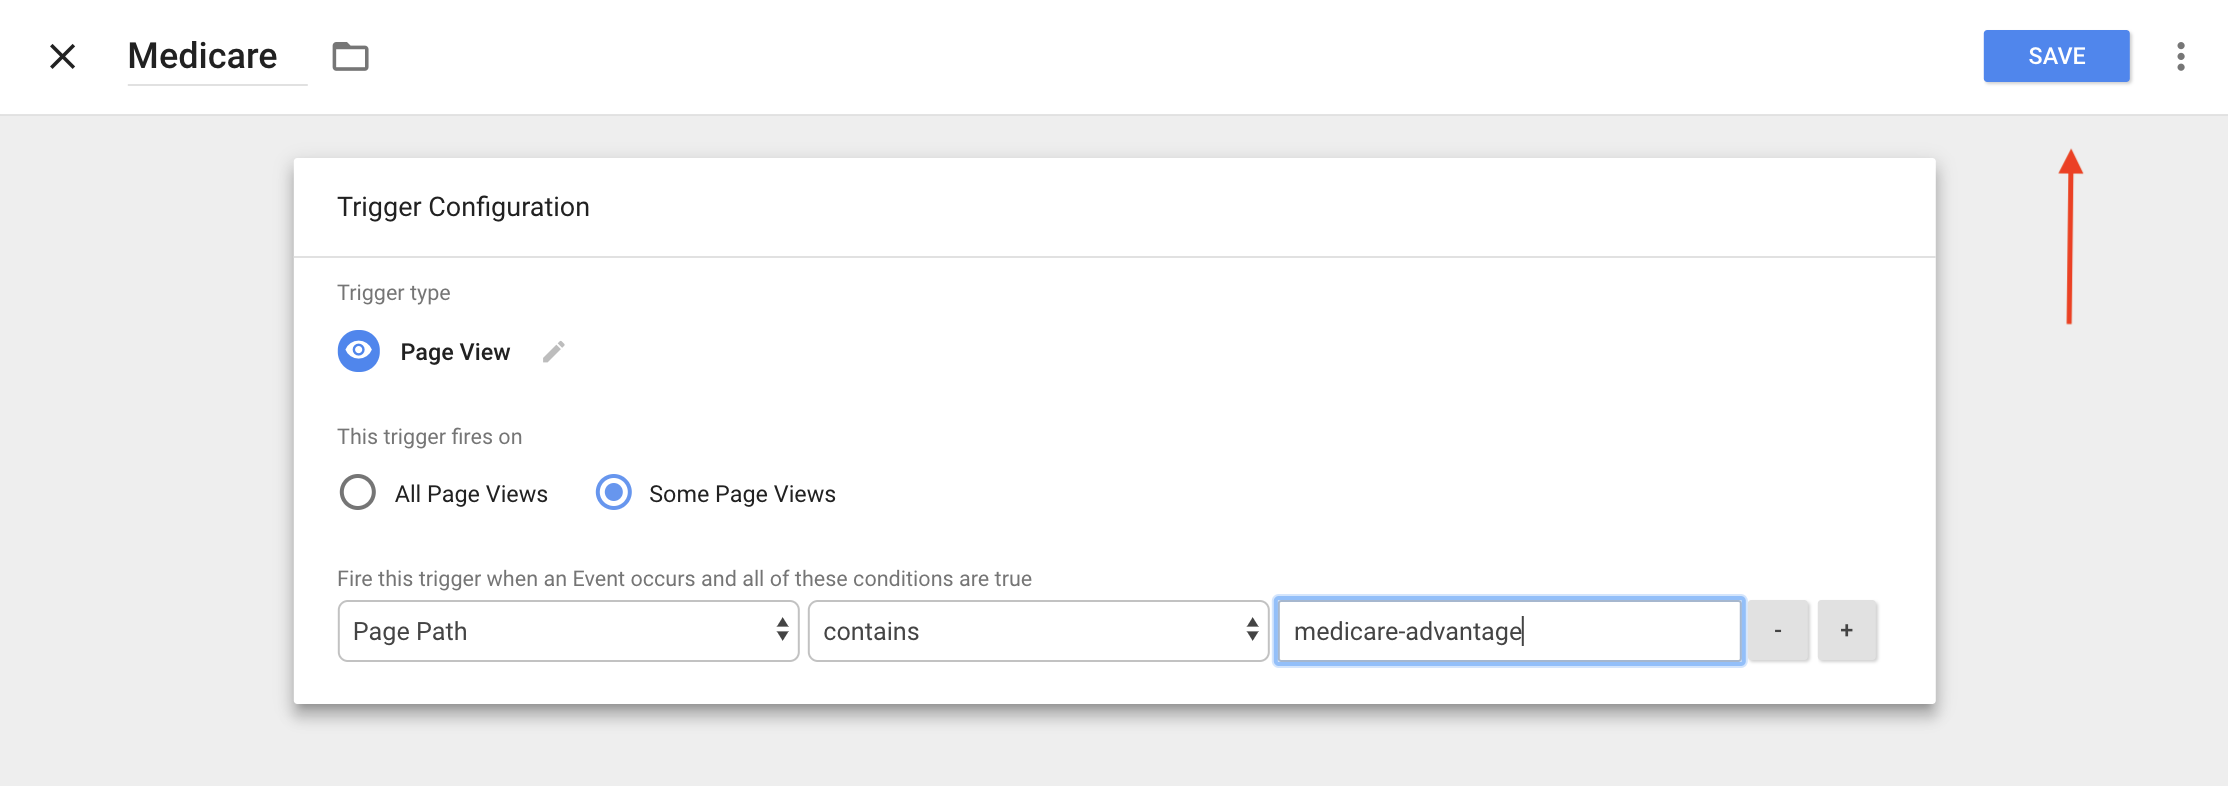
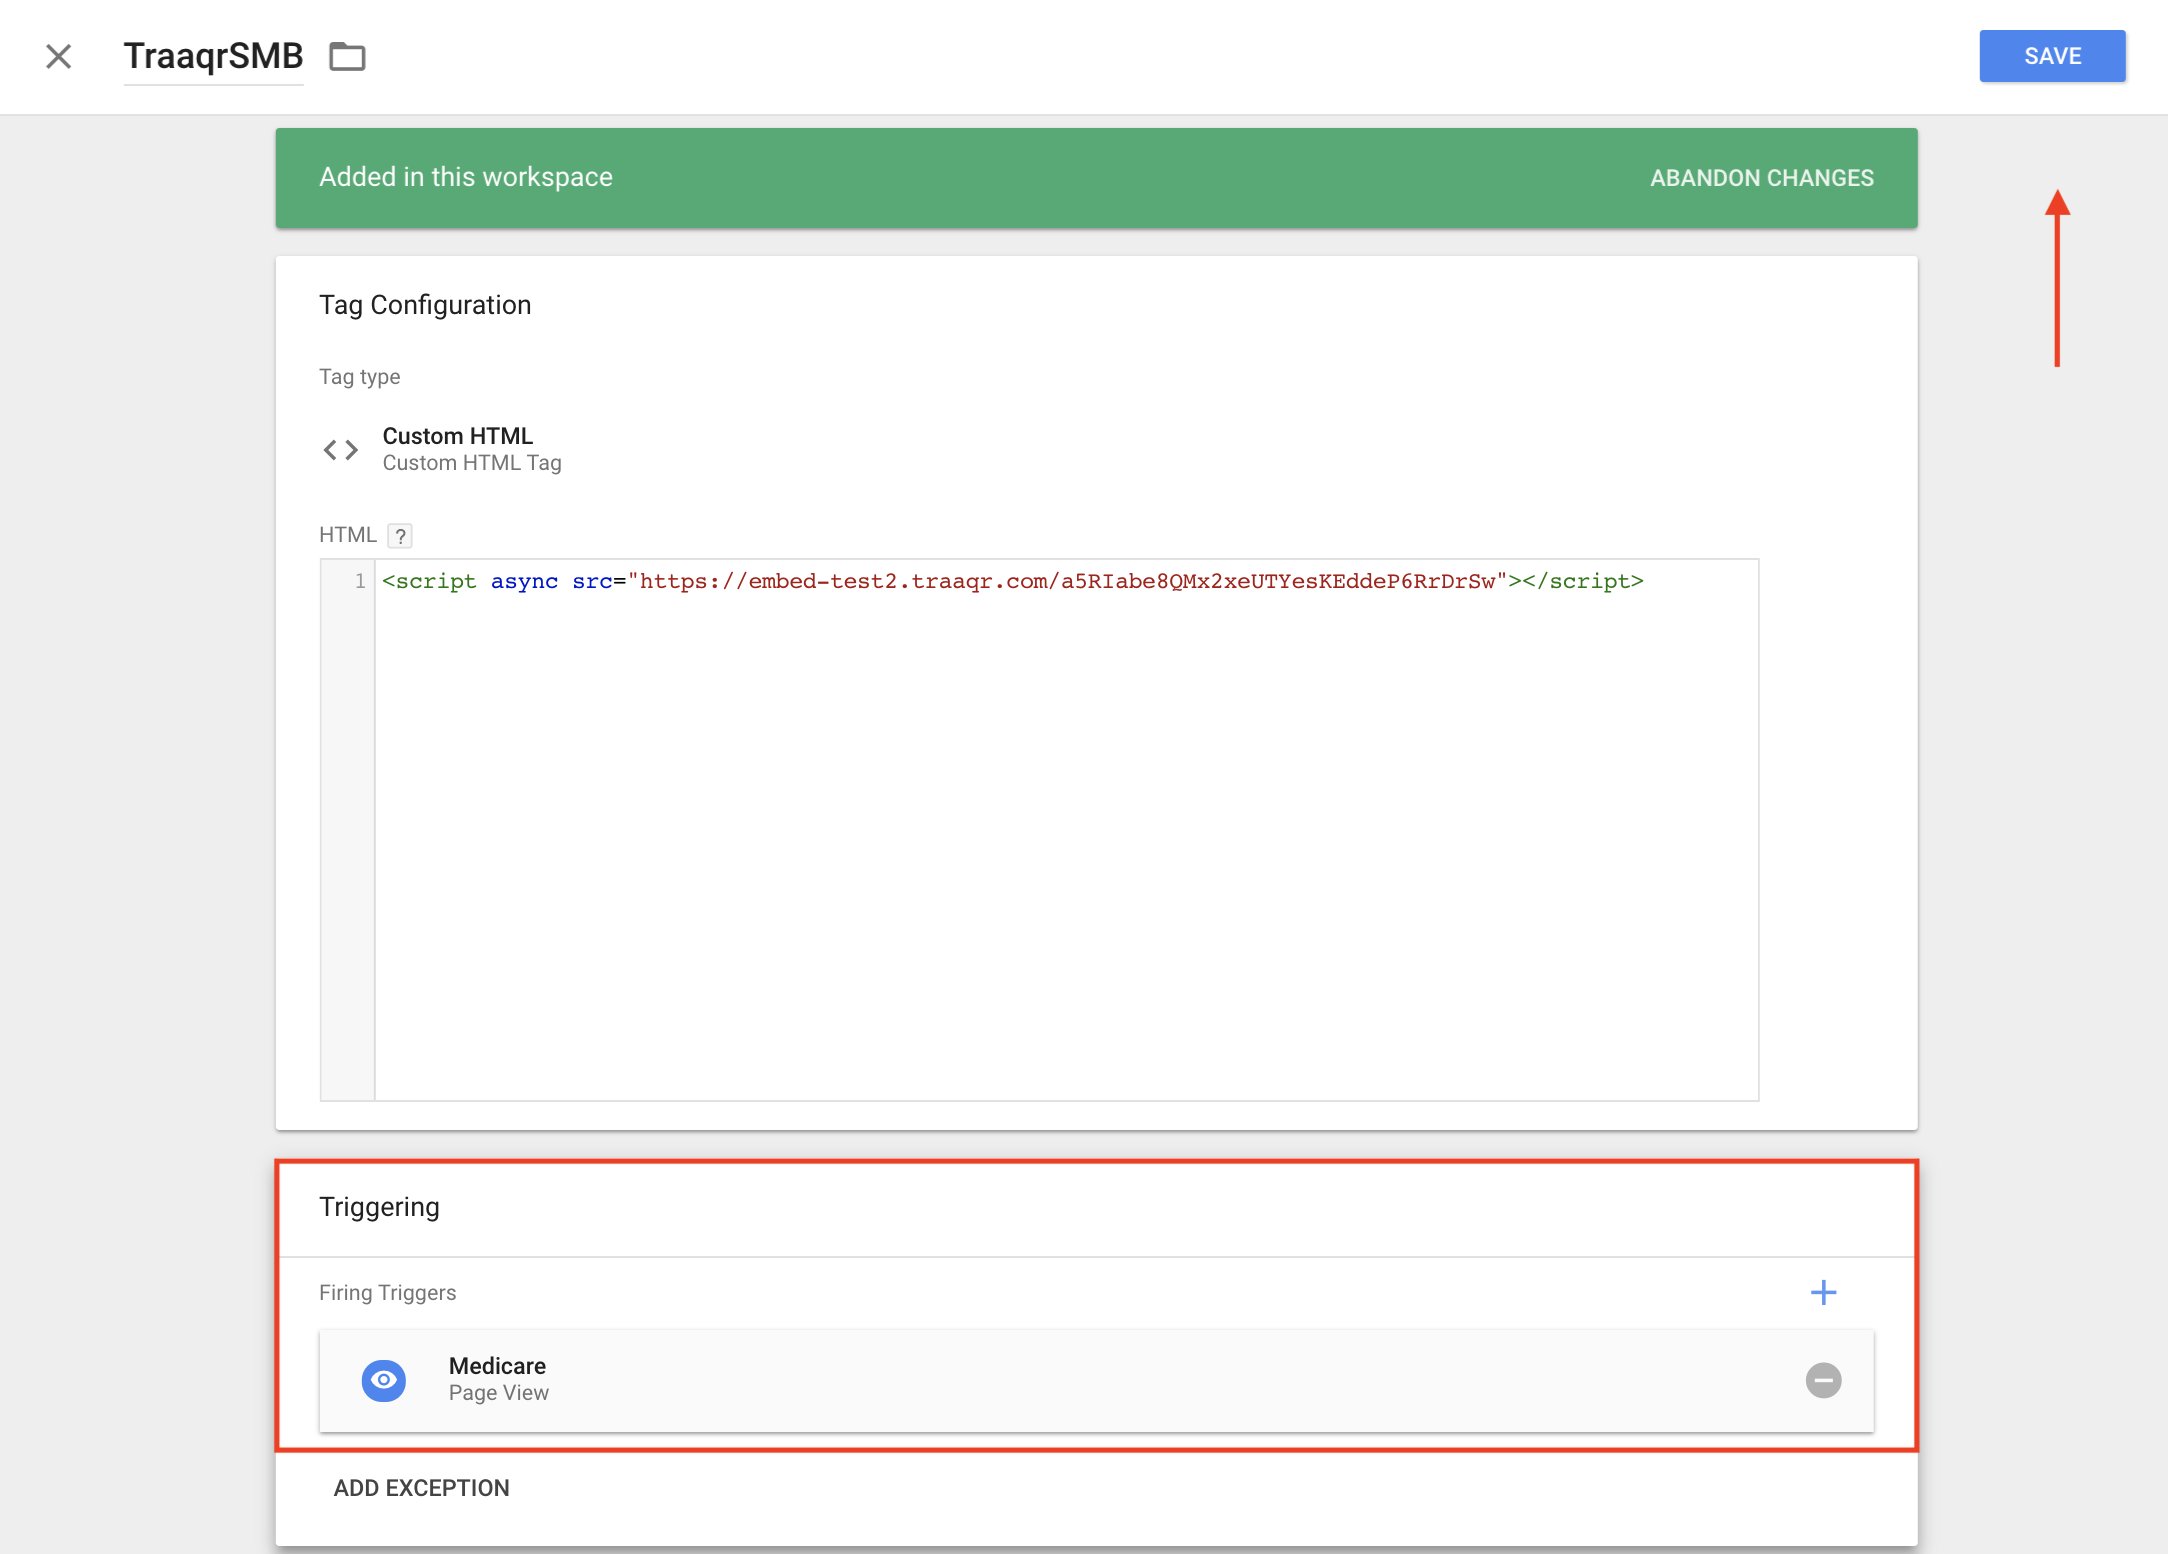
17. The Triggering section will now look like this. If everything looks good, go ahead and click Save.
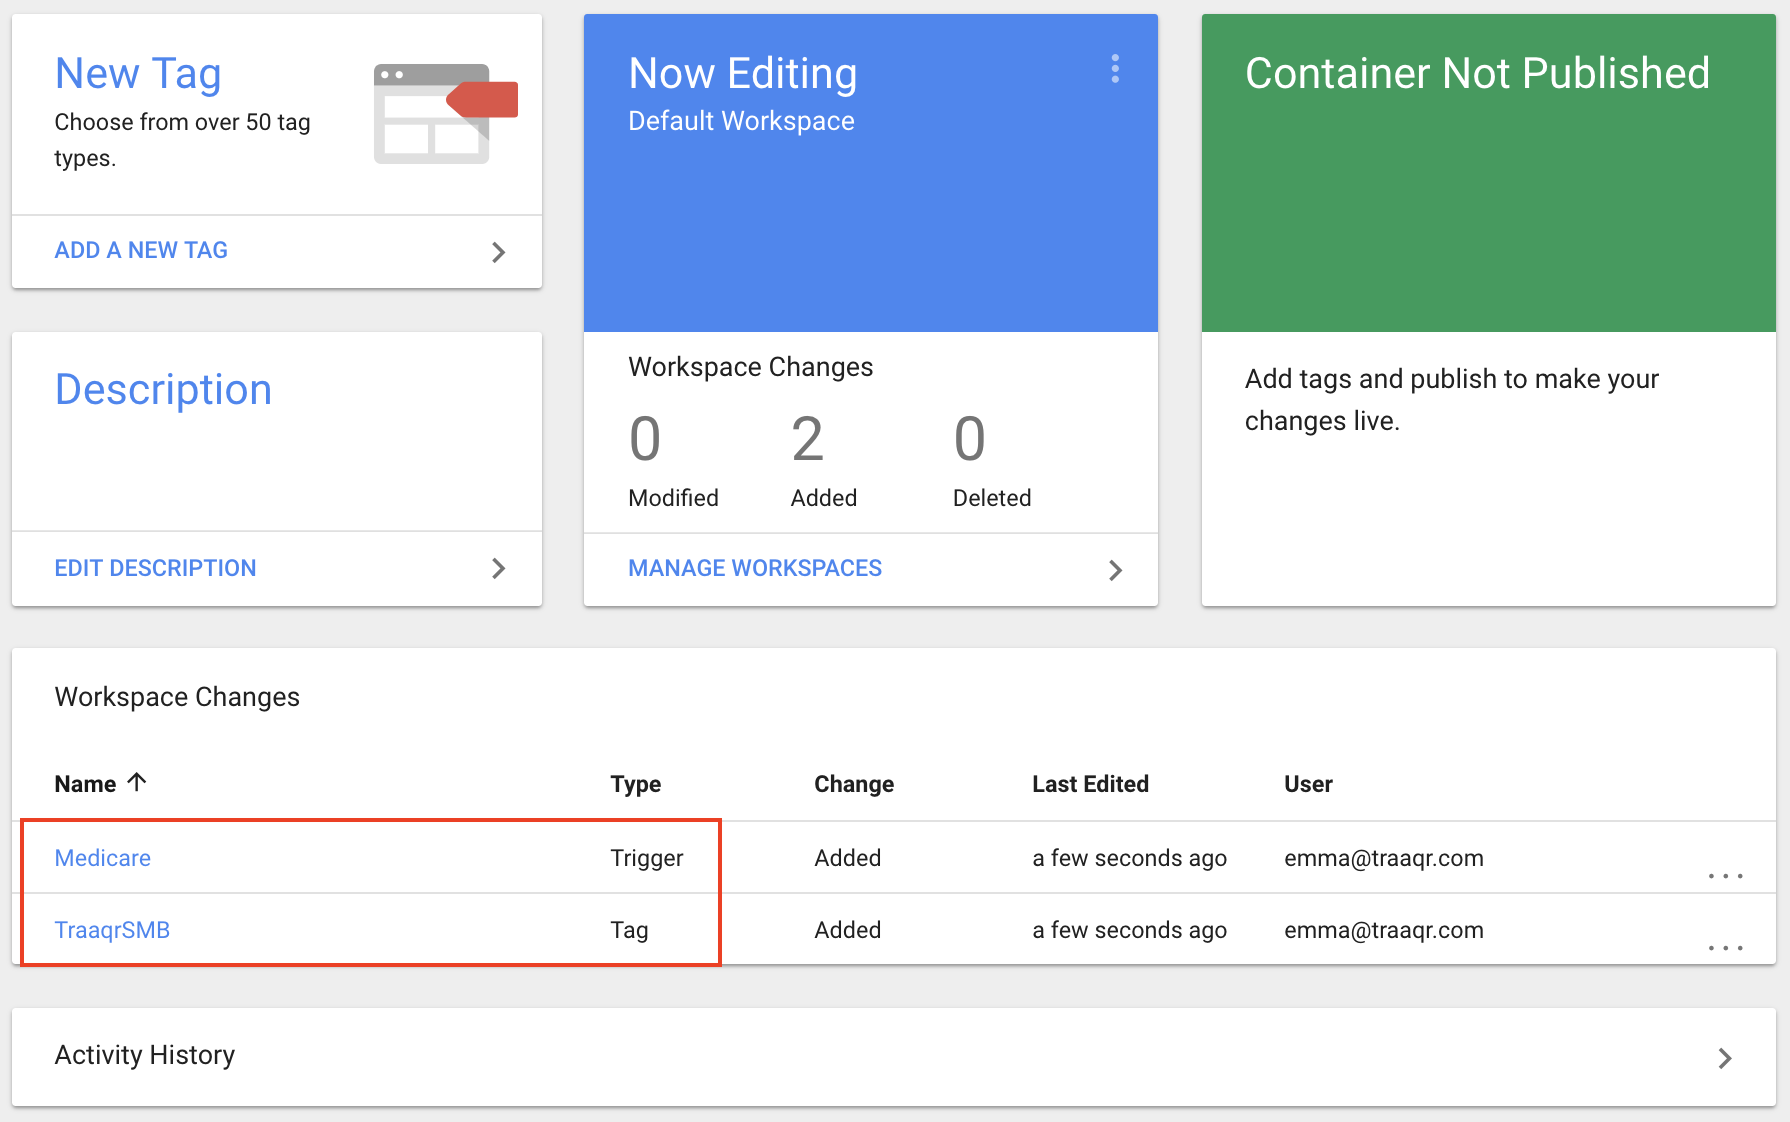
18. The Workspace Changes section will now look like this.
Optional: If you'd like to track multiple paths on the same domain:
19. Set up each path as its own Site within your Advocado account.
20. Create a new Tag and new Trigger for each path/Advocado Site by completing steps 1-7 & 11-17 in this support article.
That's it! Your code is now embedded, which will be reflected in your Advocado account once you hit refresh.